Showing posts with label nothealthyatall. Show all posts

Monday, July 22, 2013

To Pancake or not to pancake now that is the question

Pancakes how I love thee.....warm and delicious covered in syrup....add a side of sausage and oh how my morning or afternoon is all that much better. Hmmm....

Now back to reality I must go, I love pancakes and sausage with a big glass of milk. This is not a healthy meal at all and feel like I have to point out that although this is what my family had for dinner so I could get some photos, we have not had pancakes in many months and actually had to buy syrup in order to take photos.

I also have to admit that I have a box of pancake and baking mix that I used as the base for this recipe as I have not perfected my own mix, but as soon as I get the mix perfected I will share it.

The first thing I do is get my trusty griddle fired up and get the sausage going because pancakes without sausage is just so so. I would love to say I make my own sausage but our local meat locker has some amazing sausage patties and I love them with or without pancakes.

 Once that is going I mix up the batter by mixing the dry mix, 1 tablespoon of sugar (yes I use sugar here but this is an exception to our daily routine), and 1 teaspoon of baking powder. I then add in the milk, and eggs. Before adding the eggs into the batter I lightly beat them with my wire whisk. Once that is all mixed up I add in 2 teaspoons of real vanilla...if you haven't ever tried it watch for the post as I am making my own because it is so expensive in the store.


Once everything is all mixed up, I pour the batter onto a hot griddle and wait for it to begin bubbling. There will be a few at first them the pancake will begin to get some height to it and that is the making of success. If your batter is flattened out at this stage add some more of your pancake mix as you most likely added too much milk as I frequently do...I always do a test pancake....just to make sure they are edible you know.


Once the edges begin to dry you can carefully lift the edges to see if the bottom is ready to brown and then flip it over at which time it will look like this. Here you can see the edges are nice and tall with some nice air bubbles.


Once you have a few made up stack them up and add some...or a lot of syrup because you know you want to and a few sausage patties and enjoy every bite. You know you want to!


So I know that you think wow this is super easy and it is super easy that anyone can do this. Let me tell you it took me years of horrific crimes against pancakes in order to make even a single pancake that was edible. I, Jules, am a dog lover and even though I know it is wrong I will let my beloved pups eat my cooking mishaps and they almost always oblige happily, but there have been many times even my most voracious pup would not eat my pancakes. So I tell you even if your pancakes could double for Frisbees and even if the dogs would rather go hungry than eat them you cannot go wrong with this recipe.

One last thing....I will share my secret to perfectly browned pancakes.....shh....during one years black Friday madness I bought an electric griddle. You know the ones that are over priced all year long and then go on sale with a rebate the day after Thanksgiving....yeah that's the one and I love it to the moon and back! This is not another kitchen item that lives on top of the cabinets under an inch of dust....if yours is there get it out and set it to 325 degrees and whip up some batter and make you some pancakes. Eat one or two now and freeze the rest in friendly portions these do great in the freezer and are a nice treat after a long work week!

Wednesday, April 17, 2013

Comfort Food equals Banana Bread


For my family when things are out of control crazy things get forgotten; like the fresh bananas in the fruit basket. Sometimes we even like to intentionally let them turn the perfect brown for something sweet and savory and the perfect pick me up. Ok so I have lots of perfect pick me ups, but this one is very easy, quick, and nearly fool proof. If you forget a few ingredients it may or may not turn out nearly as great.

 
Nearly Foolproof Banana Bread
Ingredients:
1/2 Cup Butter...if I am in a hurry I will use Margarine straight out of the fridge since its soft cold
1 Cup Sugar
1 Egg
3+ Medium Brown Bananas I have used up to 5 and this still turns out great
2 Cups Flour
1/2 tsp Baking Soda
1 tsp Baking Powder
5 Tbsp Milk
I love that this is made with what I like to call real ingredients, ones that we almost always have in the kitchen. I admit I am most likely to be out of sugar.....I have a sweet tea addiction and can't help it.  These are the perfect stage to make banana bread; I love buying the brown ones from the store when they are deeply discounted and make up some to freeze. Getting bananas at the perfect stage helps with flavor, but if they are a little worse than these they will still work great. If they have turned to liquid mush then it's past time and best to freeze for smoothies later.
Contrary to most people's thoughts I do not pre mix the dry ingredients and jump right in. So throw the butter and sugar in the bowl and get to mixing. After the butter and sugar are well mixed add the egg and mix well. Once the egg is mixed in begin adding the bananas. I wanted to make sure that you saw the inside of the bananas since they look a little worse for the wear in the last photo. These are soft and I cut off any really brown areas. Then I just mix the bananas in until they are broken up, but not completely demolished. Leave some of the chunks for little surprises in the bread. 

Because the best part of comfort food is the ease, at this point just begin throwing in the dry ingredients. I try to separate the baking soda and baking powder but if I am in a hurry I just go with it and it always seems to work out. Once the flour, baking soda, and baking powder are mixed in add the 5 tablespoons of milk and mix until there are no pools of milk. Once everything is mixed together you are ready to put it into the pans. At this point I usually think oh no I forgot to grease the pans and I do love the bread to slide right out. So out comes the greatest invention ever...well at times like this I think this is the greatest invention.....the flour spray, oh how I love you. I use medium sized pans so I spray 2 real quick and divide the batter evenly. I jiggle the pans a little if the batter isn't spreading out evenly but that happens rarely.
 
If you know me really well you know that I hate high electric bills, so I do not pre-heat the oven. Just turn it onto 350 degrees, and put the pans into the oven. My oven takes about 5 minutes to get up to 350 so I just set the timer for 45 minutes and walk away. After 45 minutes you should have some really great smelling bread that is a nice golden brown and slightly cracked on the top. I also don't always check the inside if it looks like it does on the right. After about 5-10 minutes I will remove the bread from the pan. If you don't it will begin to sweat and you will have soggy bread.
 
After trying to resist the urge to pick it up and tear off chunks and eat an entire loaf, I do slice just one just to make sure it's perfect for my family to eat.


 The kid's do prefer to add butter while it's still hot!


For Printable Recipe click here.


Sunday, April 7, 2013

Apples and TV...they just go together

The week has been exceptionally crazy, but some of it I may have brought on myself. The quick story is Tuesday evening after some of the worst customer service from our cable provider, I turned the cable service off at both my own and my mother's house.

Had I been thinking and not acted rash, I would have realized that left my less than 24 hours to determine what I was going to do and do it quickly so that the herd would be able to watch their favorite show Wednesday evening. Wednesdays are crazy long days and having technologically challenged parents did not help that day go any faster. So desperate times call for desperate acts.....and I decided I would find a way that would allow the herd to watch their favorite shows and I not be required to deal with awful customer service, because mindlessly watching TV is the herd's favorite past time. Hello Apple TV, I sure hadn't ever planned to buy one but now I wish I had oh so long ago.

There it is the tiny black box that saved
 my sanity!

A little about Apple TV in case you are like me and hadn't ever paid any attention to it, hey if it ain't broke why fix it is my motto. First you need a Wi-Fi....check I already had one. Next and I didn't know this until I went to plug it in, your TV needs to have an HDMI slot. Well if you are like me and have the mega I will herniate you if you try to move me box TV.....you better start begging to borrow one...in my case I had my eyes set on my son's TV. Pretty much I said you are grounded from your TV for so long for poor behavior that I am going to use it until I decide to buy a new one. Third you need an iTunes account...well if you are buying an Apple TV you probably have at least an iPhone. Last you don't need one but I recommend a hulu plus account....it's 7.99 such a small price for my sanity. If your on the fence you can see if a free account is more to your liking and in your budget. A side note is if you do not already have the iTunes Match, it is worth it unless you have a monstrous hard drive, which I do not so I gladly paid for the match.
As with any Apple product you better believe the user interface is top notch and this one does not disappoint. My phone picture is pretty terrible but my camera picture was worse with the glare off the screen. This is the home screen in case you haven't seen it. So far there hasn't been any time where there isn't something to watch, and I get to watch some of my all time favorite shows that have long been cancelled. One of the things I have learned is that the shows that are available free on the web, can be seen on the TV through airplay sharing. I haven't tackled this yet as there is no shortage of things to soak up my day.


In the spirit of Apple and as a way to celebrate my break from horrible customer service I decided that I needed to have a really great apple recipe to share with you. So I made one of my all time favorite things...well I have a lot of favorite foods, but if there is a choice I will always go for apple cobbler. So here is my super quick way to make your own apple cobbler.

Ingredients:
3 medium apples (I used red delicious ones that were getting wrinkly on my counter)
1 tablespoon cinnamon
2 tablespoons sugar
1/4 cup butter
1 cup flour
2 teaspoons baking powder
3/4 cup sugar
3/4 cup milk

First core, peel (only if you prefer, I didn't), and chop the apples. Add 1 tablespoon of cinnamon and 2 tablespoons of sugar to the apples and let them sit while you make the batter. To make the batter melt the butter in a 9"x9" or similar sized baking dish. I use the microwave and while it's working mix the flour, baking powder, sugar, and milk in a glass bowl until it's smooth. Once smooth pour this directly onto the melted butter. Pour the apples directly on top of the batter. Bake at 325 degrees for 45 minutes or until the top is golden brown.


I eat this straight up without any toppings, but feel free to add some vanilla ice cream on top!

For printable recipe click here.


Sunday, March 24, 2013

My Favorite Pound Cake

After a few warmer than usual days, today was not so warm and windy cold. Cold as in I had to get my coat and scarf to leave the house, cold as in my heat is on high in the truck, cold as in can I just get in bed and stay there! Cold as in it's a perfect day to think about summer while baking to warm up the house; when I think of summer I think of strawberry shortcake. Well it's only shortcake in spirit because I hate shortcake, but I sure do love poundcake especially light fluffy melt in your mouth poundcake. This one dish no matter where or when I eat it takes me to summer nights sitting on the patio with family and friends. Perfection!


I truly have never shared this recipe before, I have even hid the original recipe from my family to ensure that no one else would ever show up with the same dish to a potluck, because you can guarantee I will bring some type of strawberry and poundcake dessert. It is irrational but this is something that I worry about to the point that it will keep me up for several weeks knowing that a potluck is coming. But I have had my arm virtually twisted by my precious friend from design school. She is an amazing true Southern girl and has moved home to Mississippi, and I am in Texas....how can we have summer nights under the setting sun sharing a great summer dessert if we are so far apart.  So this is for you Angie, a truly amazing lady and true Southern Belle, we just won't think about everyone else who also have the recipe now!

Now down to the real reason we are here, the making of my favorite pound cake, this is by no means a healthy recipe so definitely enjoy in moderation.


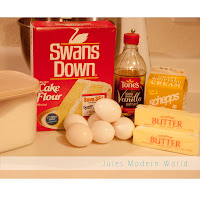
First collect all your ingredients together, anything ingredient that is refrigerated will need to be room temperature. Everything is a basic pantry staple for most people with the exception of the cake flour and whipping cream. I have tried to substitute these for items that I typically have on hand, but once you have it this way you sure can't stand anything different. It has been so long since I tried to substitute the ingredients that I do not remember what works and what doesn't work substitution wise. If you come up with one that works, please share.

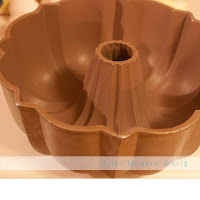
First you have to get your pan ready, I prefer using a bundt pan. Mostly because saying it makes me happy but this is also a good size recipe so you need to be prepared. I have a heavy aluminum bundt pan, which works wonderfully. I am not sure where you can purchase these, but mine came from an estate sale and was just a few dollars. If you are a bundt pan aficionado, my pan is to the right and I would love to know more about it. If you don't have one like this for years I used the cheapy one that my mother sent in UPC labels from syrup and it came in the mail....why do I remember this from so long ago...I really do not know why my brain retains so many random things. If you do not have a bundt pan or are making this with the intention of making a trifle with square pieces of pound cake you can use loaf pans. I have used 7 1/2"x 3 3/4" mini loaf pans using the same cooking time with great success. It is very important at this stage to butter and flour your pan or pans, yes you can use the spray as long as you use the one with the flour added. The outer texture will be a little different if you use the spray but not to the point of being noticeable.
 
Ever since getting a stand mixer, that is my go to piece of equipment when it comes to baking. My tip to you is never try to use your kitchen aid to attempt to break up cold butter....your whisk will get all bent up and you will have a deformed whisk for all eternity because replacing it is futile as you will do it again, maybe only I will do it again as I have bent a few lot of whisks beyond recognition with cold butter. I do have a new spare whisk for when mine becomes unrecognizable unusable. If you bend your whisk and all the wires are flattened out just do your best reshaping it and take it for a spin in your bowl to make sure it isn't hitting the bowl too bad.

Please note that when kitchen aid says
"Not Dishwasher Safe"
this isn't a suggestion it really should say if you put this in the dishwasher all the shiny pretty finish will become pitted and dull, so just don't do it. But maybe I am the only rebel out there who says I installed that dishwasher and I plan to use it for everything! In all seriousness the pitted top of the whisk and bent tines doesn't make my kitchen aid stand mixer any less of a excellent addition to my kitchen.


Now onto the important stuff, cream 3 sticks of butter and 3 cups of sugar together until it's light, fluffy and a pale yellow color.
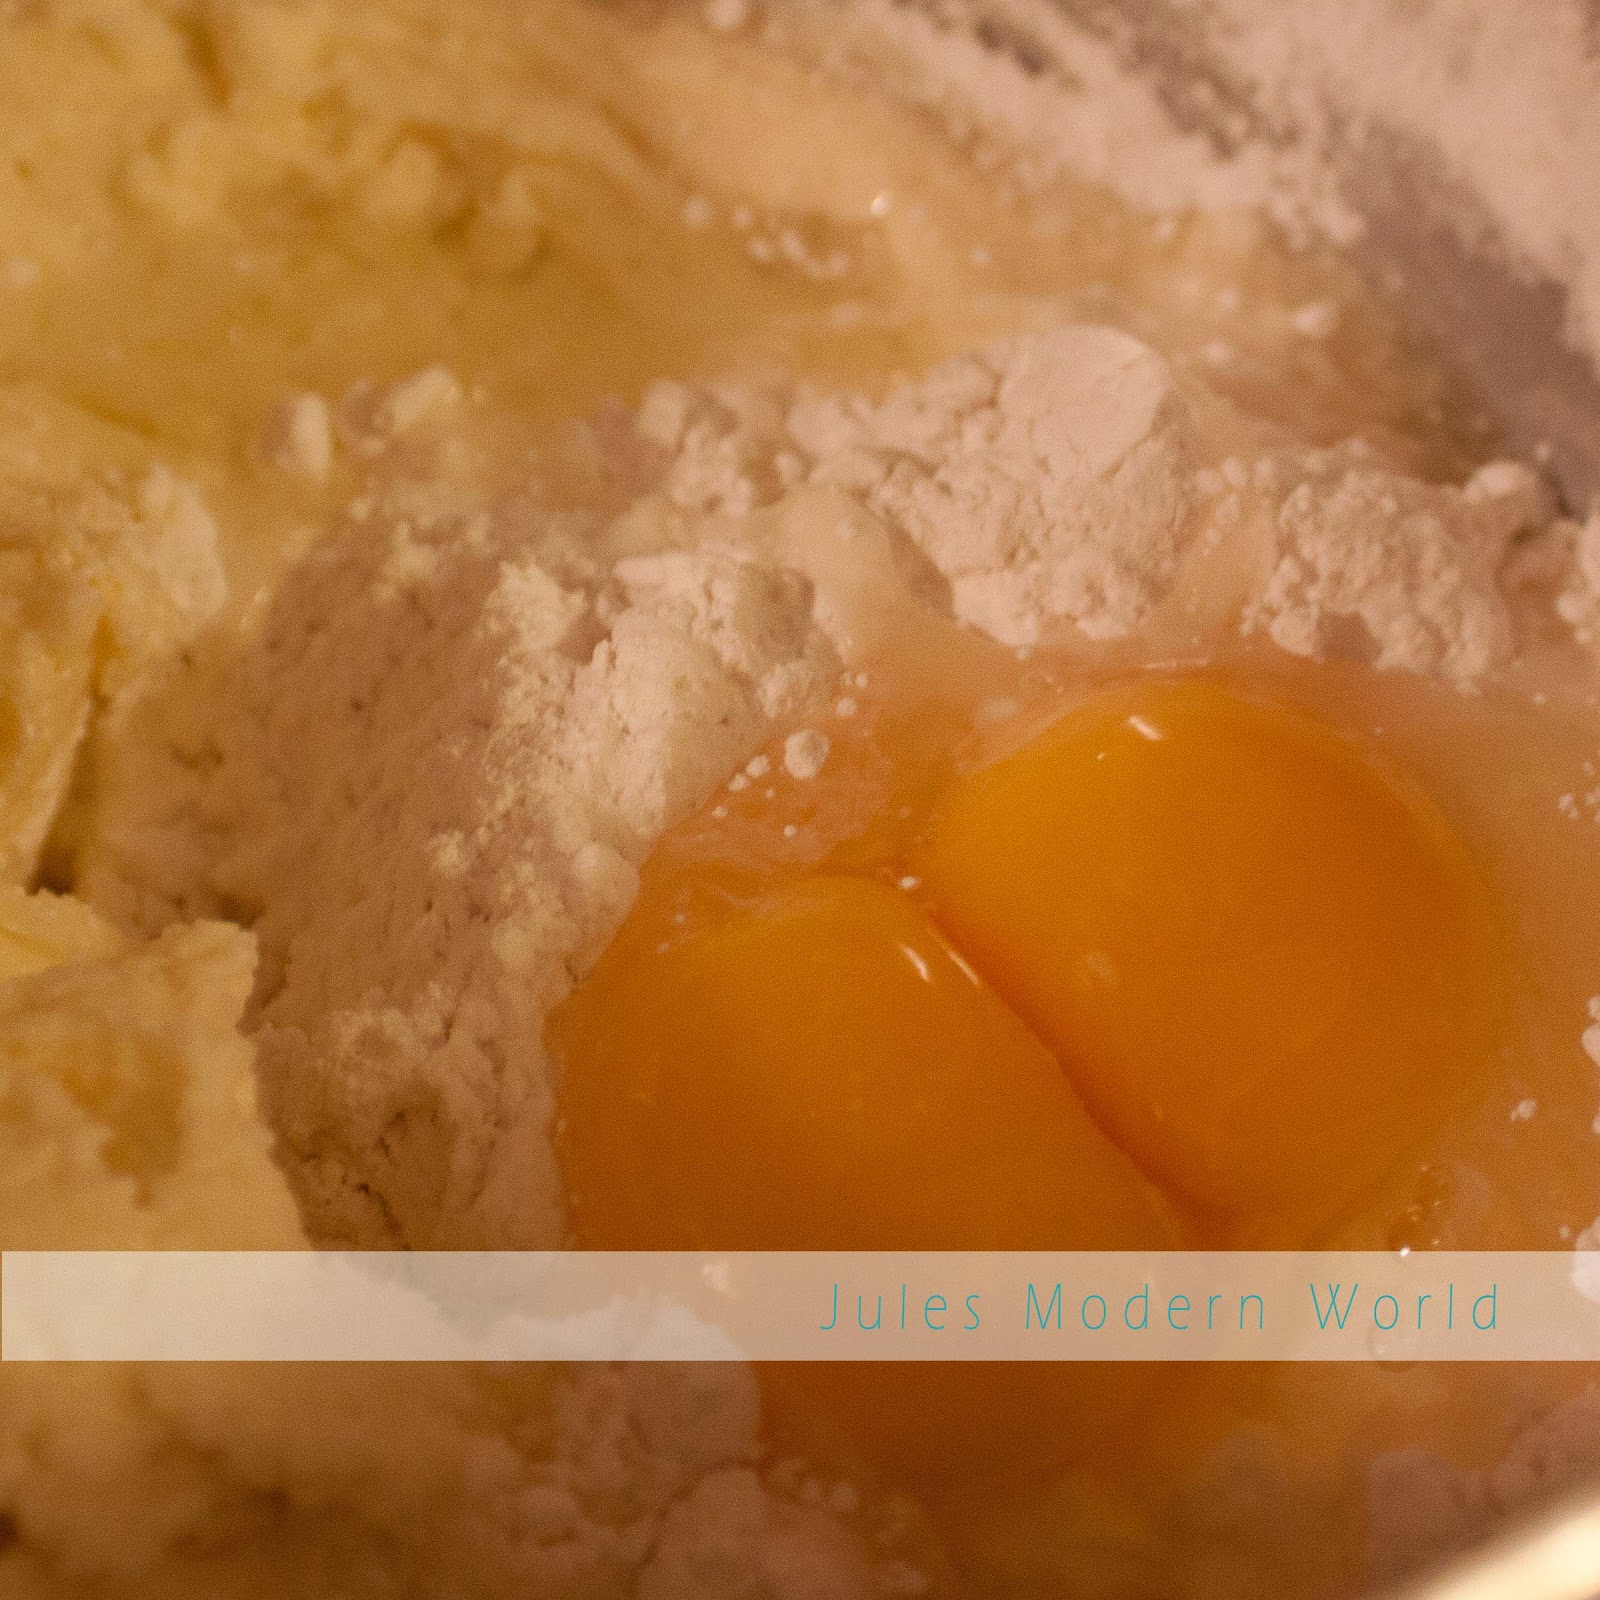
Once it's light and fluffy add 3 cups of cake flour and 6 eggs alternating 1 cup of flour and 2 eggs until all the flour and eggs are incorporated and well mixed.
 
After the eggs and flour are incorporated and well mixed add 3tablespoons of vanilla extract. This is going to look like a lot, but trust me you will love the end result. After adding the vanilla mix on medium speed for 2 minutes or until the vanilla is incorporated throughout.


After everything is mixed together you should notice that the batter is getting lighter and fluffier. Add 1 cup of heavy whipping cream and mix for another minute. You may need to use a spatula to incorporate the cream at the beginning as it tends to splatter a lot. I just begin on low speed and work my way up to a medium speed. This will be very quick as once the whipping cream is added you are going to mix the batter for only 1 minute at which point this is what it should look like.

Once you have everything mixed together pour the batter into the pan or pans of your choice.

It is very important to preheat the oven to 325 degrees fully prior to placing the pan in the center of the oven. I have found that if you have many pans it is best to space them out so that there is plenty of air flow around the pans. Once you place the cake in the oven and shut the door do not open it again for 90 minutes, not even to peek until the time is up. This will be the longest time of your life, well maybe not but I am always glued to the oven door with the light on...I guess I am afraid it may run away..not really but I still tend to watch through the door a lot more than I would even check. The world won't stop spinning if you do open the door, but the cake will be denser, heavier, and will take longer to cook.

After the timer goes off, you can open the door and you should be able to see the top of the cake is golden and the edges are browned. I always like to check with a toothpick or butter knife in a location that won't be too noticeable if this is for sharing. If it comes out clean I transfer the pans to a waiting wire rack to cool slightly. Once the cake has cooled enough that I flip the cake out of the pan onto the wire rack to cool the remainder of the way to cool completely long enough that I can cut into the cake.

 
Once the cake is cooled completely, slice into pieces and serve with some strawberries and whipped cream while dreaming of summer nights with great friends and family.


I hope that you love this pound cake as much as I do and make a ton of great memories with friends and family while enjoying this on summer nights. Also please don't blame me if you show up to a potluck with it and there is none left when you get through the line, I tell my family if you want some you better get through the line early!


For a printer friendly recipe click here.